Warp Speed Ahead, L7 Open Source Packet Generator: Warp17
If you’ve noticed a slow-down in diaries over the past few days, check out this picture on twitter https://twitter.com/tbeazer/status/742509914900271104 from our State of the Internet Panel. That is quite a few of us at SANSFIRE 2016 #SANSFIRE. It is the once a year pilgrimage that some of us take to gather together and take some training. Before going Warp17, it felt important to note that even ‘handlers’ need training.
So, Lorna? Challenge thrown down, challenge accepted. (Look for a review of SANSFire from the handlers over the next couple of months)![]()
Now, onto a tool a colleague and friend sent over. The website can be found @ http://warp17.net/ and codebase @ https://github.com/Juniper/warp17. First question I asked was ‘why Warp17’, what’s the cool GEEK reference? Well, this handler was expecting some cool ‘Star Trek’ reference and was met with “Who’s A Rapid Packet generator? [1]” Ahhh… Warp17 cause it goes REALLY FAST…. *where’s the coffee?*
The authors state, with hardware used to achieve, that Warp 17 can push near 40Gigs out an x64 platform. Not only that, it can send out http packets. See Docs regarding their layer 7 aspirations, according to documentation “WARP17 currently supports RAW TCP and HTTP 1.1 application traffic. Even though we are currently working on adding support for more application implementations, external contributions are welcome.[2]”

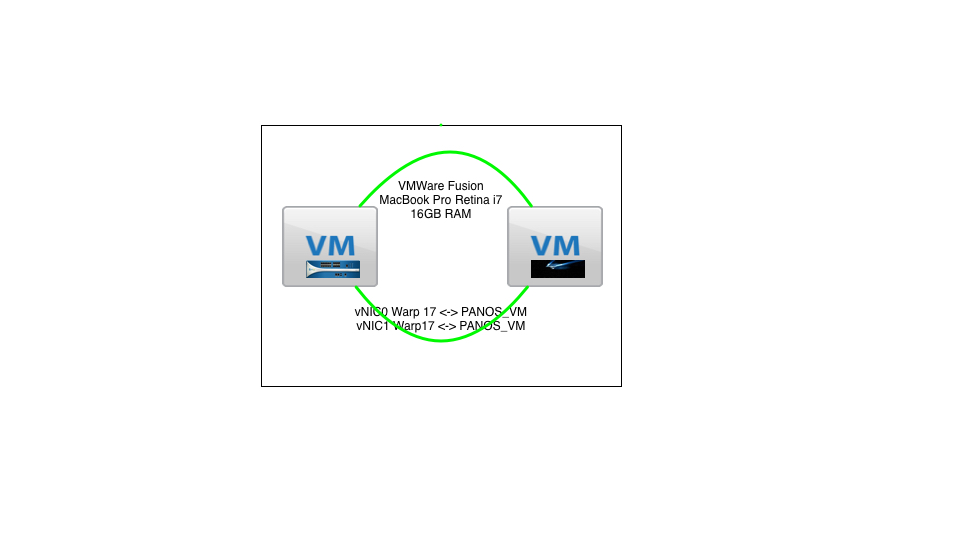
Fig 1. Basic Logical Setup
First thing I noticed is running this as a virtual machine (VM) on a lab laptop will require some cores. This application is CORE hungry and likely designed to be run on hardware or virtual machines with some serious cores available to it. In my VM, it was given 4GB RAM and 4 Cores. Setting aside the first two cores for CLI and Management and second 2 cores for packet generation. Now, it is highly unlikely *sarcasm* that we will get 40Gb of packets out of two cores from the laptop i7 it is running on, but here we go….

Fig 2. CPU Cores on Laptop i7
The documentation is pretty straight forward, but some math will be involved. The first step in the example was doing some bitwise math to determine core usage. According to the readme figure 3 is the table for the command. After review, it looks like my –c command is 0xF.

Figure 3. Bitmask Table from README
After looking at a blank memory channel output when building my own VM, some discussion with the author ensued and getting memory channels from a VM and from some hardware can have different results. The Warp17 team has built a Star Ship *poor attempt at humor* for us [4] [5]. This began the (not-so)fun adventure of downloading a 1G VM on the #SANSFIRE hotel link.
Further dialog concluded that the –n command ‘can’ be left out on virtual machines safely as memory is dynamically allocated. The –m command will inform the virtual hypervisor how much ram is requested and my start command seems to be:
-c 0xF -m 2048
Now before you go off on an adventure to build your own VM, please take a look at the Warp17 Virtual Machine README https://github.com/Juniper/warp17/blob/dev/common/ovf/README.md and decided carefully if you want to download theirs. The authors have already patched DPDK for you and done some test. At the time of this writing, the author disclosed that 1.1 is in the works and should be released some-time after this diary in the next day or two, and he’s not marketing so it will likely be the next day or two *sarcasm filled humor*.
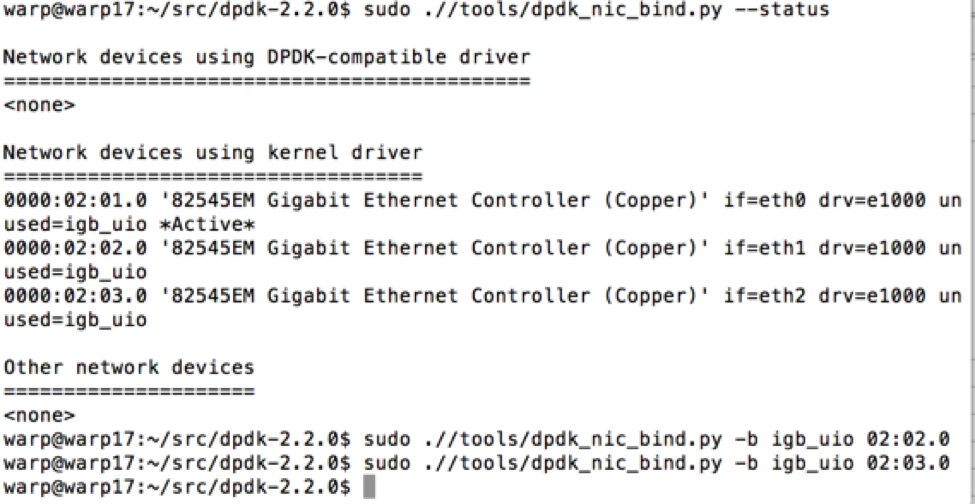
Following the README, check dpdk in order to find status of the vNICs (see figure 4.) The VM README [6] covers this, in short, we need to bind interfaces to dpdk.. So far it seems that my first vNIC is active, at first glance there are some issues. vNIC0 is for management and CLI, vNIC1 and 2 seem to be inactive. When bringing up your interfaces for use with Warp17 don’t add an L3 IP like some people did *cough* me *cough* (RTFM, the Warp17 authors cover a lot of this). For a full run through on getting dpdk to attach to NIC refer to this readme section (https://github.com/Juniper/warp17/blob/master/README.md#configure-dpdk-ports) [7].
For those that want to just jump straight to QEMU? Read the VM README fully, there are instructions on how to take flight on QEMU quickly [6]. When dpdk is set correctly and you sprinkle magic pixie dust on your VM (*kidding* ‘It’s pretty straight forward if you RTFM’) figure 4 is what you should see.

Figure 4.
Warp Speed Mr. Sulu!
sudo ./warp17/build/warp17 -c f -m 2024-- \
--tcb-pool-sz 1 \
--cmd-file /home/<user>/warp17/examples/
Make sure to pay attention to -m and set your page sizes to the memory you have allocated to Warp17, it seems the Warp engines in this ship are VERY hungry. Also, it was noted to pay attention to the tcp-pool-sz, notice in the manual the default was 10 and the developers had a monster hardware platform to work with. My little Fusion VM on my MacBook Pro would probably cry and tap out very fast with a 10, so we set this argument to 1.
Moving on to examples, for those of us that “Just want to fire it up and set Phasers to “blast out packets” the authors have CFG examples in *musical tone* da da DA ‘the examples directory’. Note: Found in the Warp17 directory (where ever you put it) under ./examples.
Bottom line, this application is worth a look as a low cost (code is free), open source, BSD licensed "star ship" designed to generate a ton of packets. The authors are active and ready to collaborate.
Find them on social media @
Twitter: @warp1_7
Facebook: https://www.facebook.com/warp17stg
Google: https://groups.google.com/forum/#!forum/warp17
GitHub: https://github.com/Juniper/warp17
References
[2] https://github.com/Juniper/warp17
[3] https://github.com/Juniper/warp17/blob/master/README.md#performance-benchmarks
[4] https://github.com/Juniper/warp17/tree/dev/common/ovf
[5] http://warp17.net/downloads/
[6] https://github.com/Juniper/warp17/blob/dev/common/ovf/README.md
[7] https://github.com/Juniper/warp17/blob/master/README.md#configure-dpdk-ports


Comments