Rotating Packet Captures with pfSense
Having a new pfSense firewall in place gives some opportunities to do a bit more with the device. Maintaining some full packet captures was an item on my "to do" list. The last 24 hours is usually sufficient for me since I'm usually looking at alerts within the same day. I decided to do rotating packet captures based on file size. This allows me to capture packets, saving files of a specific size and keeping a specified number of files.
I'll be keeping files 1,000 MB (1 GB) in size and storing a total of 300,000 MB (300 GB) That means I'll be storing a rotation of 300 files. The packet captures are going to be performed using tcpdump [1], which comes preinstalled on pfSense.
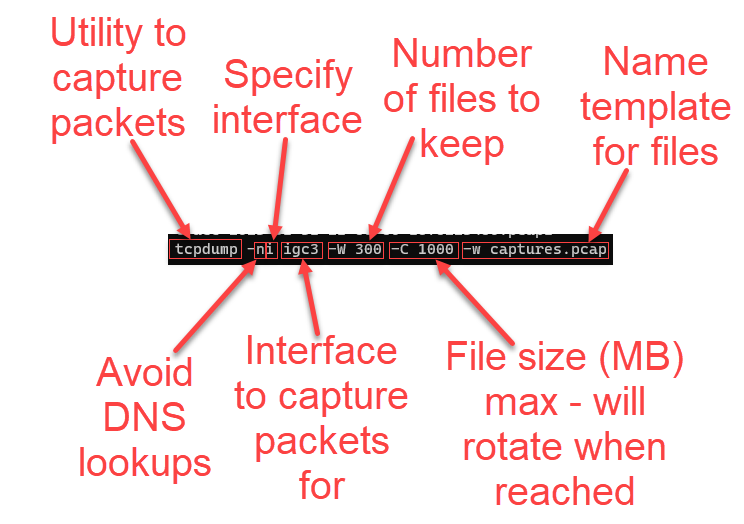
tcpdump -ni igc3 -W 300 -C 1000 -w captures.pcap

Figure 1: tcpdump options for keeping a rotation of 300 files of packet captures 1GB in size
Running the command itself is relatively easy. I could use:
- the Command Prompt [2] option within fpSense
- the local console
- an administrative SSH session
Any of these options work well, but don't help me with one thing: automation. I considered a variety of options here and ran into a solution from Olaf Schwarz. Olaf put together a great example of a script that could be used to help automate the process and using a package available in pfSense [3].
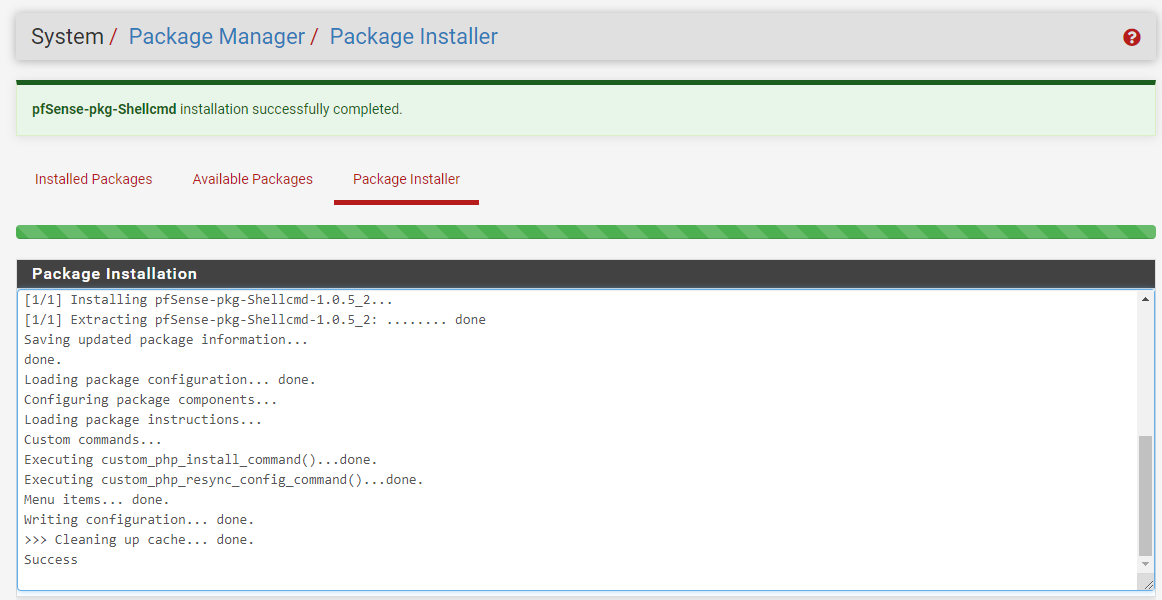
This solution uses Shellcmd and it can be installed from the pfSense Package Manager [4].
System --> Package Manager (search for "shellcmd")

Figure 2: Installation of Shellcmd using pfSense Package Manager
If I wanted to simply run the tcpdump command on startup I could just add it to Shellcmd. Shellcmd would take it from there and would initiate the command during the boot process. However, there are some benefits to the script created by Olaf that would allow me to easily start, stop or check the status of packet captures without rebooting the firewall to kick off the process.
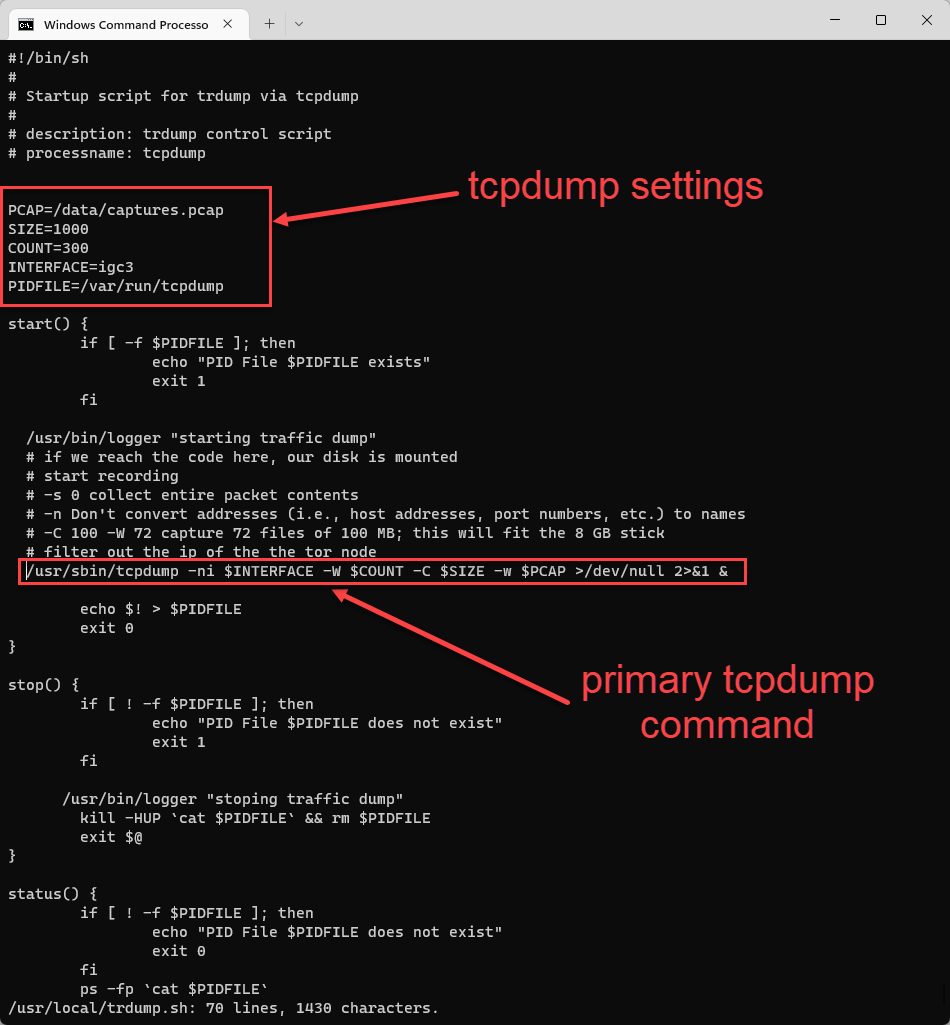
Some modifications to Olaf's script were made for my situation:
- Using internal "live" storage and not externally mounted media
- Using rotation settings for 1GB file captures and keeping last 300 files

FIgure 3: Highlights of script modifications for tcpdump
A subset of my changes is also available below. For the full script, check out Olaf's blog post [3].
#!/bin/sh
#
# Startup script for trdump via tcpdump
#
# description: trdump control script
# processname: tcpdump


PCAP=/data/captures.pcap
SIZE=1000
COUNT=300
INTERFACE=igc3
PIDFILE=/var/run/tcpdump

start() {
        if [ -f $PIDFILE ]; then
                echo "PID File $PIDFILE exists"
                exit 1
        fi

  /usr/bin/logger "starting traffic dump"
  # if we reach the code here, our disk is mounted
  # start recording
  # -n Don't convert addresses (i.e., host addresses, port numbers, etc.) to names
  # -C 1000 -W 300 capture 300 files of 1000 MB;
  /usr/sbin/tcpdump -ni $INTERFACE -W $COUNT -C $SIZE -w $PCAP >/dev/null 2>&1 &
As outlined in Olaf's blog, I stored the file in /usr/local/trdump.sh and also enabled execution. Since i was going to be storing the captures in the root "data" directory, I also created that folder.
chmod +x /usr/local/trdump.sh
mkdir /data
If creating the file locally on the firewall from an SSH session, make sure to familiarize yourself with vi [5]. The only thing left to do is reference the script through Shellcmd.
Services --> Shellcmd
 Figure 4: Enter script command in Shellcmd package
The "start" command will run the command if tcpdump is not already started. In this case, I started just by running the command from an SSH session and then checked the status.
/usr/local/trdump.sh start
/usr/local/trdump.sh status

Figure 5: Output of tcpdump script "status"
Checking the /data path shows the new PCAP files in the directory.
 Figure 6: Rotating PCAP files generated from script
It's recommended to keep PCAP files at or below 100MB in size since it can cause delays when reviewing files with tools such as Wireshark. In my case, I wasn't concerned since I wanted to store less files and could easily extract what I needed. For example, if I wanted to take a look at data only for my honeypot, one quick command can get me what I need.
tcpdump -r /data/captures.pcap001 host 192.168.68.178 -w /data/filtered.pcap
 Figure 7: Creating file of extracted PCAP data for a specific host
The new PCAP is much smaller and could easily be transferred to a different system or quickly viewed using tcpdump from the command line.
tcpdump -r /data/filtered.pcap tcp port 80 -v | head -n 20

Figure 8: Using tcpdump to view traffic on TCP port 80
There are a lot of options to modify this setup, but gives some great opportunities to take a deep dive into network packet captures.
[1] https://linux.die.net/man/8/tcpdump
[2] https://docs.netgate.com/pfsense/en/latest/diagnostics/command-prompt.html
[3] https://www.00010111.at/blog/2017/06/27/add-traffic-recording-to-pfsense-easily/
[4] https://docs.netgate.com/pfsense/en/latest/packages/manager.html
[5] https://www.redhat.com/sysadmin/introduction-vi-editor
--
Jesse La Grew
Handler


Comments
Matt
Feb 12th 2023
3 years ago
Jesse
Feb 16th 2023
2 years ago